Help guide · macOS
Using a microphone or audio input device
Prefer a live feed over system audio — a built-in mic, a USB audio interface, your DJ mixer or controller routed in, or a loopback device? Set Source to Microphone in the Source tab and a Mic input dropdown lets you pick any input macOS sees. Here's the flow, including the one-time microphone permission.
-
Pick Microphone as your source. In the Source tab's Audio input section, open the Source menu and choose Microphone. (The other choices are Off and System audio.)
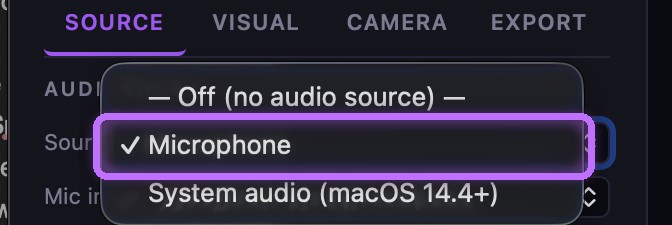
Source → Microphone. -
Choose your input device. A Mic input dropdown appears listing every input macOS sees — the built-in mic, a USB audio interface, your DJ mixer or controller routed in, a loopback device like BlackHole, an external mic, or Default (system). Pick the one you want.
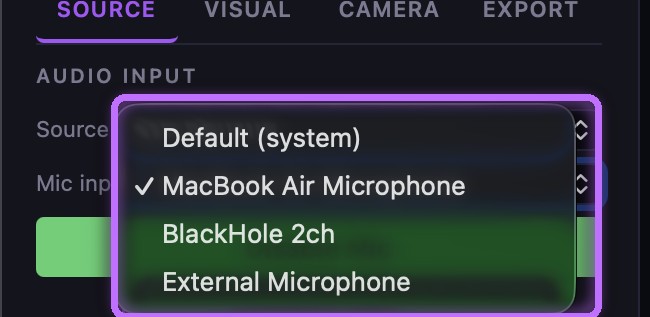
The Mic input dropdown — pick any available input device. -
Enable it and click Allow. Click Enable mic. The first time, macOS asks — "Spiralyst Lab.app would like to access the Microphone." Click Allow.
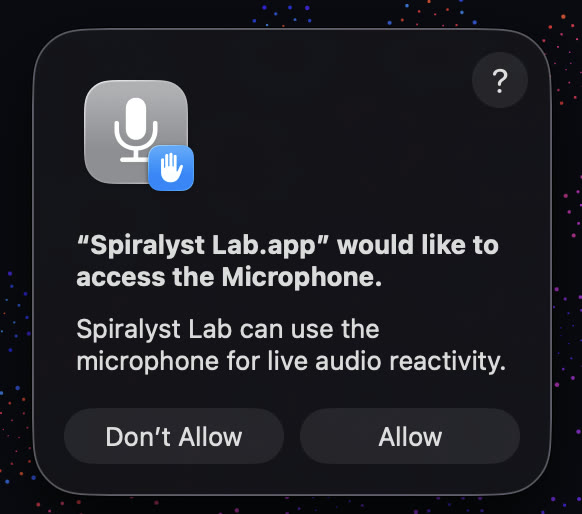
Click Allow on the one-time macOS permission prompt.
Your privacy: Spiralyst Lab uses the microphone or input device for live audio reactivity only — nothing is recorded or transmitted. Exports are video-only: captured audio is never written into an exported file.
Troubleshooting: Don't see your device? Make sure it's connected and recognized by macOS (System Settings → Sound → Input) — anything macOS lists appears in the Mic input dropdown, including USB interfaces, mixers, and loopback tools like BlackHole. Change or revoke microphone access any time under System Settings → Privacy & Security → Microphone.
Related
Prefer to watch? See the tutorial Capturing your system audio.